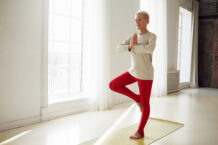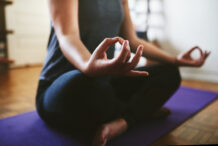

Yoga may call to mind impressively flexible people striking impossible-looking poses. But you don’t need to spend 60 minutes in a studio, execute a handstand, or tote a mat to reap some of the benefits of yoga. In fact, you don’t even need to stand up.
Chair yoga is a highly customizable workout that can be done in several ways: performing adapted yoga poses while seated in your chair, standing up and using your chair for support while you move through a series of poses, or a combination of both. It can open the door to yoga for many people who—whether due to injury, balance problems, decreased mobility issues common with aging, or just long hours at a desk—can’t fully participate in a traditional yoga class. It’s even helpful if you already practice yoga but are traveling or can’t squeeze in a full workout.
Whether you sit in the chair or use it for balance, chair yoga can provide many of the same benefits as traditional yoga, including improved flexibility and balance. Almost any pose can be done while seated, according to the Yoga Journal, which touts the benefit of chair yoga as “the stretch without the strain.”
Minding the research
Large-scale studies on chair yoga specifically are few and far between, but research has found some health benefits.
- A 2023 study in Healthcare followed 85 women in Taiwan with knee osteoarthritis. Half were assigned to 12 weeks of chair yoga therapy twice a week, while the other group made no changes. After four months, women in the chair yoga group had significantly higher levels of functional fitness and daily life activity scores than the women in the comparison group.
- A 2021 review in the International Journal of Environmental Research and Public Health looked at 19 studies of chair-based exercise programs in 1,388 adults at least 50 years of age. The results showed that chair yoga was associated with increased strength in both the upper and lower extremities.
- A 2019 review of 27 published research studies found that, compared with adults who remained inactive, chair yoga was associated with significant gains in balance, lower body flexibility, and lower limb strength. Even compared with other active adults, those who practiced chair yoga had better lower limb strength and flexibility. The review also looked at health-related quality of life and found significant benefit for chair-yoga participants compared with inactive participants (better scores for perceived mental health, perceived physical health, sleep quality, and vitality). Yoga participants also had better scores on depression measures than people who were active but did not do chair yoga.
An expert thumbs-up
The practice has a big fan in Janet Yamada Soto, DPT, retired physical therapist and a member of the Wellness Letter editorial board. She shares how chair yoga recently helped two relatives stay involved and active during a family gathering.
“My extended family went to a resort for a short vacation in the mountains. My 90-year-old determined mother wanted to join us in the yoga class, but her balance was not sufficient. So she sat in a chair and did it to her best ability. One of my other relatives had had a stroke many years prior and was able to use the chair as a prop to hold onto.”
What’s great about chair yoga is that it can be tailored to a person’s ability, according to Soto, whether it’s a fast or slow pace and involves easy or difficult movements.
“Chair yoga is excellent for folks with balance and mobility problems at any age,” she says. “It incorporates breath, which is important in every part of living and being—for example, respiratory conditions, mindfulness, stress, and recovery from a period of inactivity. And it is a very adaptable exercise in which one can find much success and sense of accomplishment.”
Tips on getting started
- Choose the right chair. You’ll want something that doesn’t have arms or wheels (unless they lock). A firm, straight-backed chair is best. You should be able to sit with your feet on the floor and your knees bent at a 90-degree angle.
- Have any props handy. Yoga blocks can help you position your feet or hands at the right level. Straps can help you gain a deeper stretch. A towel might be useful for wiping sweaty hands or supporting your lower back.
- Wear comfortable clothing. You don’t need to change into workout gear for chair yoga, but do avoid anything that’s uncomfortably tight or restricts your movement.
- Get expert coaching. Many gyms, YMCA/YMHAs, and recreation centers offer chair yoga classes. If you’re new to yoga altogether, having a teacher present can ensure that you’re moving through the poses in the safest and most effective way.
- Go virtual. If you’re comfortable practicing chair yoga on your own, it’s easy to find websites, TikTok videos, YouTube channels, and apps that can walk you through a great chair workout. Yoga with Adrienne has several gentle chair workouts, as does Yoga with Kassandra. The American Council on Exercise provides examples here for better balance. The poses described in the box below are from the Yoga Journal, and their website has many more, clearly illustrated with photos.
BOTTOM LINE: Chair yoga can be a great way to stay active, improve flexibility and build strength after an injury, or just stretch out tight muscles and find some relaxation during the course of a long day. And it’s a workout that can be done by people of all ages and fitness levels. As with any exercise program, check with your doctor before starting anything new if you have prior injuries or serious mobility or other health issues, like osteoporosis. Extreme twisting, for example, may increase the risk of fractures. Don’t stretch beyond what feels comfortable, and stop any movements that are painful.
These three chair-yoga poses, from YogaJournal.com, can combine to give you a full-body stretch. They are being reprinted with permission from an article called “13 Chair Yoga Poses Anyone Can Do,” where you can find images of the poses.
Urdvha Hastasana (Upward Salute)
- Sit with your back a few inches from the back of the chair. Lengthen your spine, reaching the crown of your head up and gently releasing your tailbone toward your seat. Lift your chin parallel to the floor.
- Place your feet flat on the floor with your big toes touching and a little space between your heels. (If you experience lower back pain, practice with your feet hip-distance apart. Place your feet on blocks if they don’t reach the floor.) Root down with your big toe mounds, your heels, and the outside edges of your feet.
- Inhale, draw your shoulders back, soften your front ribs, and raise your arms overhead with your hands shoulder-distance apart and palms facing each other.
- If you’re able to keep your arms straight, reach up and touch your palms, bringing your gaze to your thumbs. If your shoulders are tight, take your arms out wider than your shoulders.
- Take several breaths. Release your arms down.
Ustrasana (Camel Pose)
- Sit on your chair with your feet hip-width apart.
- Inhale and arch your back, allowing your shoulder blades to touch the back of your chair.
- Lift your chin and sternum, broaden your collarbones, and allow your shoulders to fall back and away from your ears.
- Reach your arms back to grasp the legs of the chair. Rotate your arms externally so that the insides of your elbows face out.
- On your next inhalation, press your chest forward and up, allowing your rib cage to expand and creating a long even curve through your mid and upper back.
- Take several breaths. To release the pose, release your hands, tuck your chin, and come back to your original seated position.
Ananda Balasana (Happy Baby)
- Sit toward the front edge of the chair with your feet on the floor, a little more than hip-width apart.
- Reach the crown of your head up and draw your tailbone down to find length in your back.
- As you exhale, fold forward at your hips and bring your belly between your thighs. You may choose to widen your legs to create more space for your torso.
- Inhale and reach down between your legs and grasp your outer shins, ankles, or feet.
- Gently pull your torso down between your thighs, lowering your body toward the floor.
- Take several breaths. To release the pose, let go of your grip and come back to your original seated position.